In the realm of horticulture, one practice stands out as essential for maintaining the health and vibrancy of your garden: deadheading.
How to Thicken Up Your Lilly Pilly Hedge: Expert Guide
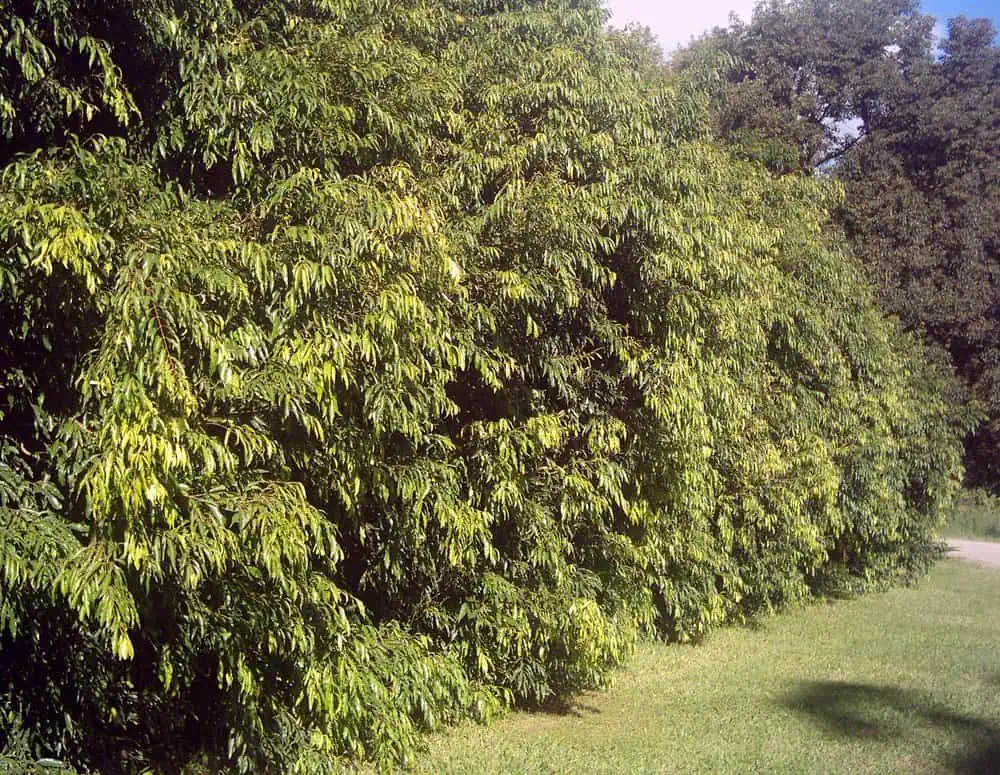
Lilly pillies, a common name for plants from the Syzygium, Acmena and Waterhousea genera, are a favourite among home gardeners and landscape professionals alike. Appreciated for their lush foliage, colourful berries, and hardy nature, they make excellent hedging plants.
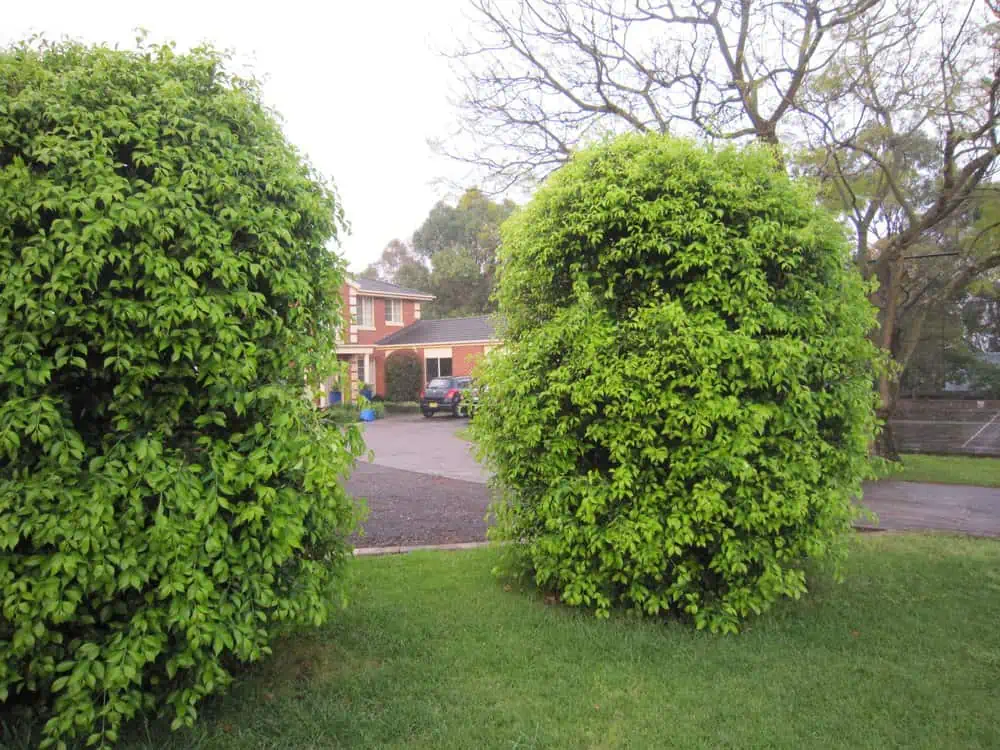
But the difference between a thick, robust lilly pilly hedge and a sparse, spindly one can be striking. A well-maintained, dense hedge not only provides more privacy but also adds incredible beauty to your garden.
Lilly Pilly Growth Pattern
Lilly pillies exhibit a variety of growth habits depending on the species or variety. Some plants grow tall and narrow, while others spread wide. Regardless of the species, most lilly pillies are known for their vigorous growth, making them the perfect plant to achieve a thick hedge.
You can train your lilly pilly with a denser, bushier appearance by providing the perfect growing conditions and regular pruning

The Optimal Conditions
Like any plant, lilly pillies thrive best under specific conditions. Understanding and providing these conditions can significantly enhance the thickness and overall health of your hedge.
Climate and Weather
Native to Australia, most lilly pillies are adapted to various climates. They can handle everything from warm to cooler climates, including coastal and inland environments. However, they do appreciate a bit of protection from harsh winds and frost in colder climates.
Sunlight
While lilly pillies can tolerate partial shade, they thrive in full sun. More sunlight generally equates to more vigorous growth, which can contribute to a thicker, denser hedge. Here’s how to optimise the amount of sunlight:
- Positioning and Trimming: Consider the position of other plants in your garden. Large trees or structures that cast shadows over the lilly pilly plants or hedges should be trimmed or moved to allow more sunlight to reach the hedge.
- Use of Mirrors: Strategically placed garden mirrors or windows can help reflect light into shaded areas, increasing the amount of sunlight your lilly pilly receives.
- Choosing the Right Plant: If a particular spot in your garden doesn’t receive enough sunlight for a lilly pilly, consider planting something else there. It’s better to choose a plant that will thrive in the existing conditions than struggle to force a lilly pilly to grow.
Soil Conditions
Lilly pillies prefer well-draining, nutrient-rich soils that are rich in organic matter. While they can tolerate a range of soil types, including clay-dominant and sandy soils, they perform best in slightly acidic to neutral pH levels.
Soil Nutrients and Fertilisers
While lilly pillies aren’t particularly heavy feeders, they do benefit from a balanced, slow-release fertiliser applied in spring and summer. A good, organic-based fertiliser will provide them with the necessary nutrients to support vigorous growth while feeding the critters in the soil.
They don’t require fertilising through autumn and early winter, because they won’t be growing as much during this time.
Regular mulching with organic matter can help to improve soil structure and nutrient content even further over time, while protecting the soil from moisture loss. Just avoid piling mulch around the trunk; we want roots in the soil and stems in the air.
A good growing environment leads to quality root development and the growth of a thick, healthy lilly pilly hedge.
Creating Micro Climates
Micro climates are small areas within your garden where the climate differs slightly from the surrounding area. You can create micro climates to protect your lilly pillies from harsh weather conditions:
- Use Structures: Garden structures like fences, walls, and greenhouses can shield your plants from strong winds and frost.
- Plant Strategically: Use other plants to create shade or trap heat. For example, planting a row of tall trees on the western side of your garden can provide afternoon shade for your lilly pillies.
Expert Techniques to Increase Hedge Thickness
Once you’ve mastered the environmental factors, you can use specific techniques to encourage your lilly pilly plants to grow thicker.
Pruning with Purpose
Regular pruning encourages lilly pillies to produce new shoots, resulting in a denser hedge. Prune lilly pillies a little bit often, rather than cutting large amounts off a plant rarely. This encourages a nice, thick, bushy branch structure.
But not all methods of pruning are equal, and there are a few tips that will help you create that bushy appearance you’re looking for.
Pruning for Density
Different pruning tools and techniques have different effects on growth. Successful pruning involves mastering two basic cuts: selective cuts and hedging cuts.
- Selective Cuts: These are used to maintain a natural branch structure by directing new growth where you want it and removing injured or less vigorous wood. This is achieved by pruning to a fork no less than one third of the thickness of the branch you’re pruning. These types of cuts don’t encourage a more bushy growth habit, they help maintain the natural branch shape which lets more light and air through.
- Hedging/Heading Cuts: These cuts are performed non-selectively at any point along the branch, such as tip pruning. This is the type of cut that promotes lateral branches to emerge from where they’re hidden within leaf axils or under the bark. If you’ve got the time to prune every cut just above a leaf, that’s technically best, but difficult to achieve with a hedge trimmer. There’s no need to get overly fussy here.
Troubleshooting a Thinning Lilly Pilly Hedge
Even with the best care, your lilly pilly hedge may sometimes struggle. Identifying and addressing these issues early can help you restore your hedge to its full, lush state.
Signs of a Struggling Hedge
Recognising a struggling hedge is the first step towards remedying it. Here are some signs that your lilly pilly may be under stress:
- Sparse Foliage: If your lilly pilly is not as dense as it used to be or has patches of thin or sparse foliage, it may be struggling. This could be due to pests or disease, lack of water, lack of sunlight or another health problem.
- Discoloured Leaves: Yellowing leaves or leaves with spots or brown edges can be a sign of stress. This could be due to a nutrient deficiency, or because the plant is too deeply planted. Try uncovering the “root flare,” which is the point at the base of the trunk where the roots start branching off.
- Stunted Growth: A lilly pilly that isn’t growing as fast as it should might be struggling. This could be a nutrient deficiency, a lack of sunlight, or a lack of available water in the soil. Sometimes the soil isn’t able to receive water, especially if it’s compacted or has become “hydrophobic,” meaning it’s coated in natural waxes from broken down leaves. Gypsum can help break up compacted soil, and a soil wetter can help looser hydrophobic soils accept water again. Organic matter like compost will help remedy the situation in the long term.
Common environmental challenges such as inadequate sunlight, poor soil conditions, or extreme weather can lead to these symptoms. Go back to the start of this article and see if any bells start ringing true for you.
Dealing with Pests and Diseases
Pests and diseases can have a significant impact on the thickness of your lilly pilly hedge. Some common issues include:
Psyllids
Psyllids are tiny sap-sucking insects that cause pimple-like bumps on lilly pilly leaves, giving the foliage a blistered appearance. In severe infestations, this can lead to leaf drop and a thinning hedge. Some other lilly pilly tree varieties, such as Syzygium australe ‘Resilience’, have been bred for psyllid resistance.

To manage psyllids:
- Avoiding waterlogging: “Wet feet” and other sources of stress can decrease a lilly pilly’s natural resistance to pests and diseases of all kinds. By helping your plant to stay happy and healthy, it can better resist pests like psyllids.
- Insecticidal soaps: These can be effective against psyllids. Spray the soap directly onto the foliage, ensuring you cover both the top and bottom of the leaves.
- Beneficial insects: Encourage natural predators such as ladybirds, lacewings, and parasitic wasps into your garden. They can help keep psyllid populations in check.
- Regular Pruning: Pruning affected foliage, which is generally fresh growth, can help reduce psyllid numbers. However, it can also encourage more fresh growth which psyllids love.
Root Rot
Root rot is a disease often caused by overwatering or poor drainage, leading to waterlogged soils. Symptoms include wilting, yellowing leaves, and eventually plant death.
To prevent and treat root rot:
- Improve Drainage: Ensure your lilly pillies are planted in well-draining soil. If necessary, amend heavy clay soils with organic matter to improve drainage. Again, a happy plant is more resilient to all types of health problems.
- Water Wisely: Avoid overwatering your lilly pillies. They prefer moist, but not waterlogged, soil.
- Fungicides: In severe cases, a fungicide may be necessary. However, improving cultural practices should always be the first step. Consider calling a qualified horticulturist to make a proper diagnosis before using any harsh chemicals. Fungicides in particular can have nasty long-term effects for your growing environment which needs friendly mycorrhizal fungi to stay healthy.
Myrtle Rust
Myrtle rust is a serious fungal disease that affects many Aussie natives, including the lilly pilly. This relentless fungus targets new growth, causing deformities in leaves, heavy leaf loss on branches, and in severe cases, plant dieback.
- Early Signs and Symptoms: The first sign of myrtle rust infection may be “chlorotic” yellow spots on leaves and shoots. As the disease progresses, you might notice brown to grey spots, often with a red-purple halo on the leaves. A few days after infection, masses of bright yellow or orange-yellow spores (powdery specks) appear on the spot’s surface. Do not proceed with treatment until you’re sure you have a positive diagnosis by an expert horticulturist, arborist or through scientific testing at a lab.
- Avoid Direct Contact: The fungus produces powder-like spores that can be easily spread through direct contact or by wind and rain. Avoid touching infected plants and ensure your gardening tools are clean and disinfected before and after pruning.
- Apply Fungicides: Chemicals such as copper oxychloride, triforine, mancozeb, tebuconazole, and trifloxystrobin can be used to control myrtle rust in your home garden. Remember not to use a single fungicide regularly. Instead, opt for those that include a demethylation inhibitor and strobilurin mix, notably tebuconazole/trifloxystrobin and cyproconazole/azoxystrobin.
While most pests and diseases are of little concern to lilly pillies, myrtle rust is no joke. It can spread to many different species within your garden. Remember, early detection and swift action are key to managing myrtle rust effectively. Keep an eye on your lilly pilly trees and take action at the first sign of trouble.
Sources of Stress: Beyond Pests & Diseases
Abiotic stress refers to non-living factors that can cause stress to plants. For lilly pillies, common abiotic stresses include:
Stem Girdling
Stem girdling occurs when ties used to support the plant are too tight, constricting the stem and restricting sap flow. This can weaken the plant and, in severe cases, cause stem death.
To prevent stem girdling:
- Use the Right Ties: Choose soft, flexible ties that won’t damage the bark.
- Check Regularly: Check ties regularly and loosen them if necessary. Remember that lilly pillies can grow rapidly, so what was a loose tie a few months ago might now be too tight.
- Remove Them: When plants have established, remove ties. A good rule of thumb is to remove ties a year after you’ve planted. If the plant still can’t stand on its own, something’s gone wrong.
Poor Drainage
As mentioned earlier, lilly pillies prefer well-drained soils. Waterlogged soils can lead to root rot and other problems.
To improve drainage:
- Amend the Soil: Adding organic matter like compost or well-rotted manure can improve soil structure and drainage, while also retaining the right amount of water – kind of like a sponge. Gypsum can be used to break up heavy clay and allow for extra drainage.
- Plant Correctly: When planting, ensure the hole is as deep and twice as wide as the root ball, and filled with a mix of quality soil and compost. This creates a good foundation for healthy root growth and drainage. Avoid glazed sides of a hole when planting into heavy soil, because it acts like a pot that the roots will strangle each other within.
Nutrient Deficiency
A lack of necessary nutrients can lead to various problems, including yellowing leaves and stunted growth.
To address nutrient deficiencies:
- Soil Testing: A scientific laboratory soil test can determine what essential nutrients your soil lacks. You can then add specific amendments to correct any deficiencies.
- Use a Balanced Fertiliser: Regular feeding with a balanced fertiliser can ensure your lilly pillies get all the nutrients they need.
- Mulch: Mulching with organic matter can help improve soil fertility over time. It also protects the existing soil structure from the hot sun in the meantime.
Addressing Other Common Problems
Lopsided Shrub: Before pruning, pay attention to factors such as the direction of sunlight or a wound in the branch that can be preventing new growth in the right direction. Consider thinning out the overgrown side first, so that it doesn’t look so lopsided. Use heading cuts to spur new growth in the right area. Position the pruner on the part of the stem you want to remove, just above a bud (often hidden in a leaf axil) that will grow in the direction you want to and encourage dense growth. Consider tying a healthy branch in the empty spot that can fill it out. Then feed it well and be patient.
Woody, Tangled Shrub: Give the plant an overhaul by thinning out the old wood over the course of three years, making room for all new growth. Start at the base of the shrub, removing dead wood and rubbing branches. Then eliminate any more inward-pointing branches, taking out no more than one-third of the shrub’s total mass. New growth should follow the next growing season.
Bare Lilly Pilly: Sometimes, it’s just that your lilly pilly never really took off, or its started to decline all over. Maybe the conditions are wrong, which we’ve talked about extensively in this article so far. Or maybe the plant was root-bound before it was planted and has strangled itself in the ground. Sometimes, you’re just better off replacing the plant with a better specimen.
Revival Strategies
When your lilly pilly hedge isn’t thriving as you’d like, it’s important to take decisive action. There are several strategies you can employ to revive a struggling hedge.
Pruning for Rejuvenation
Sometimes, a hedge gets out of hand. Maybe it’s been hedge pruned for so long that the growth only exists on the very outside of the shape, and there’s no new growth beneath the knobby ends where you’ve been pruning to for years.
In this case, get right inside of your lilly pilly and start to thin out branches, starting with the dead wood and rubbing branches. This will allow more light to penetrate the plant and encourage growth from the inside.
It might seem harsh, but thinning out some of the branches can actually lead to additional foliage on the inside of the hedge, rather than sticks with little puffs of fresh growth on the tips.
Filling Gaps in Your Hedge
Gaps in your hedge can be unsightly and reduce its effectiveness as a privacy screen. Hopefully you haven’t got a scenario as described above, where fresh growth only exists on the outside of the hedge and you’ve tried to prune it back a bit only to be left with brown sticks. This type of mal-pruning can take time for the plant to recover.
Here are some techniques to fill those gaps and restore your hedge to its full glory:
- Weaving Sideshoots: For narrow gaps, try weaving sideshoots from neighbouring plants through rustic poles until they meet in the middle. Over time, these shoots will grow together to fill the gap.
- Planting a Tree: If the gap is too large to fill with sideshoots, consider planting a tree or a different plant in the gap. Choose a species that will grow above the hedge line, adding the desired height and interest to your garden while filling the gap effectively.
Daniel’s Wrap
Cultivating a thick, lush lilly pilly hedge takes understanding, effort, and patience. From mastering the environment and employing expert techniques to spotting signs of trouble and knowing how to revive a struggling hedge, there’s a lot to know when it comes to how to thicken up your lilly pilly hedge.
But with these tips in hand, you’re well-equipped to create a lilly pilly hedge that’s not just a boundary marker, but a standout feature of your garden. So don’t hesitate — put these techniques into practice and watch your hedge transform. Happy gardening!

This Post Has 0 Comments